Getting Started with your University Plan for Managers
Welcome to the Tactus Virtual Rehab Center Group Plan! Getting your university set up is quick and easy. Follow these steps to get started:
Step 1: Log into Your Account
As the organization manager, you’ll receive an email to set a password and log into the Tactus Virtual Rehab Center. The email link will take you there, but when you want to come back, go to rehab.tactustherapy.com to log in.
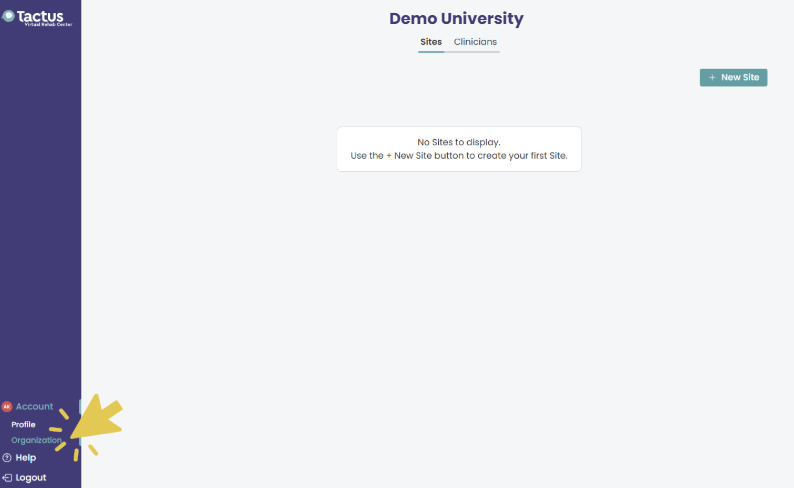
Step 2: Go to the Organization submenu
You'll find it after clicking on Account in the lower left sidebar.
Step 3: Add your Site(s)
Sites make it easier to manage and organize patients. Clinicians or staff assign patients to a site, can filter the patient list by site(s), and transfer patients between sites as needed.
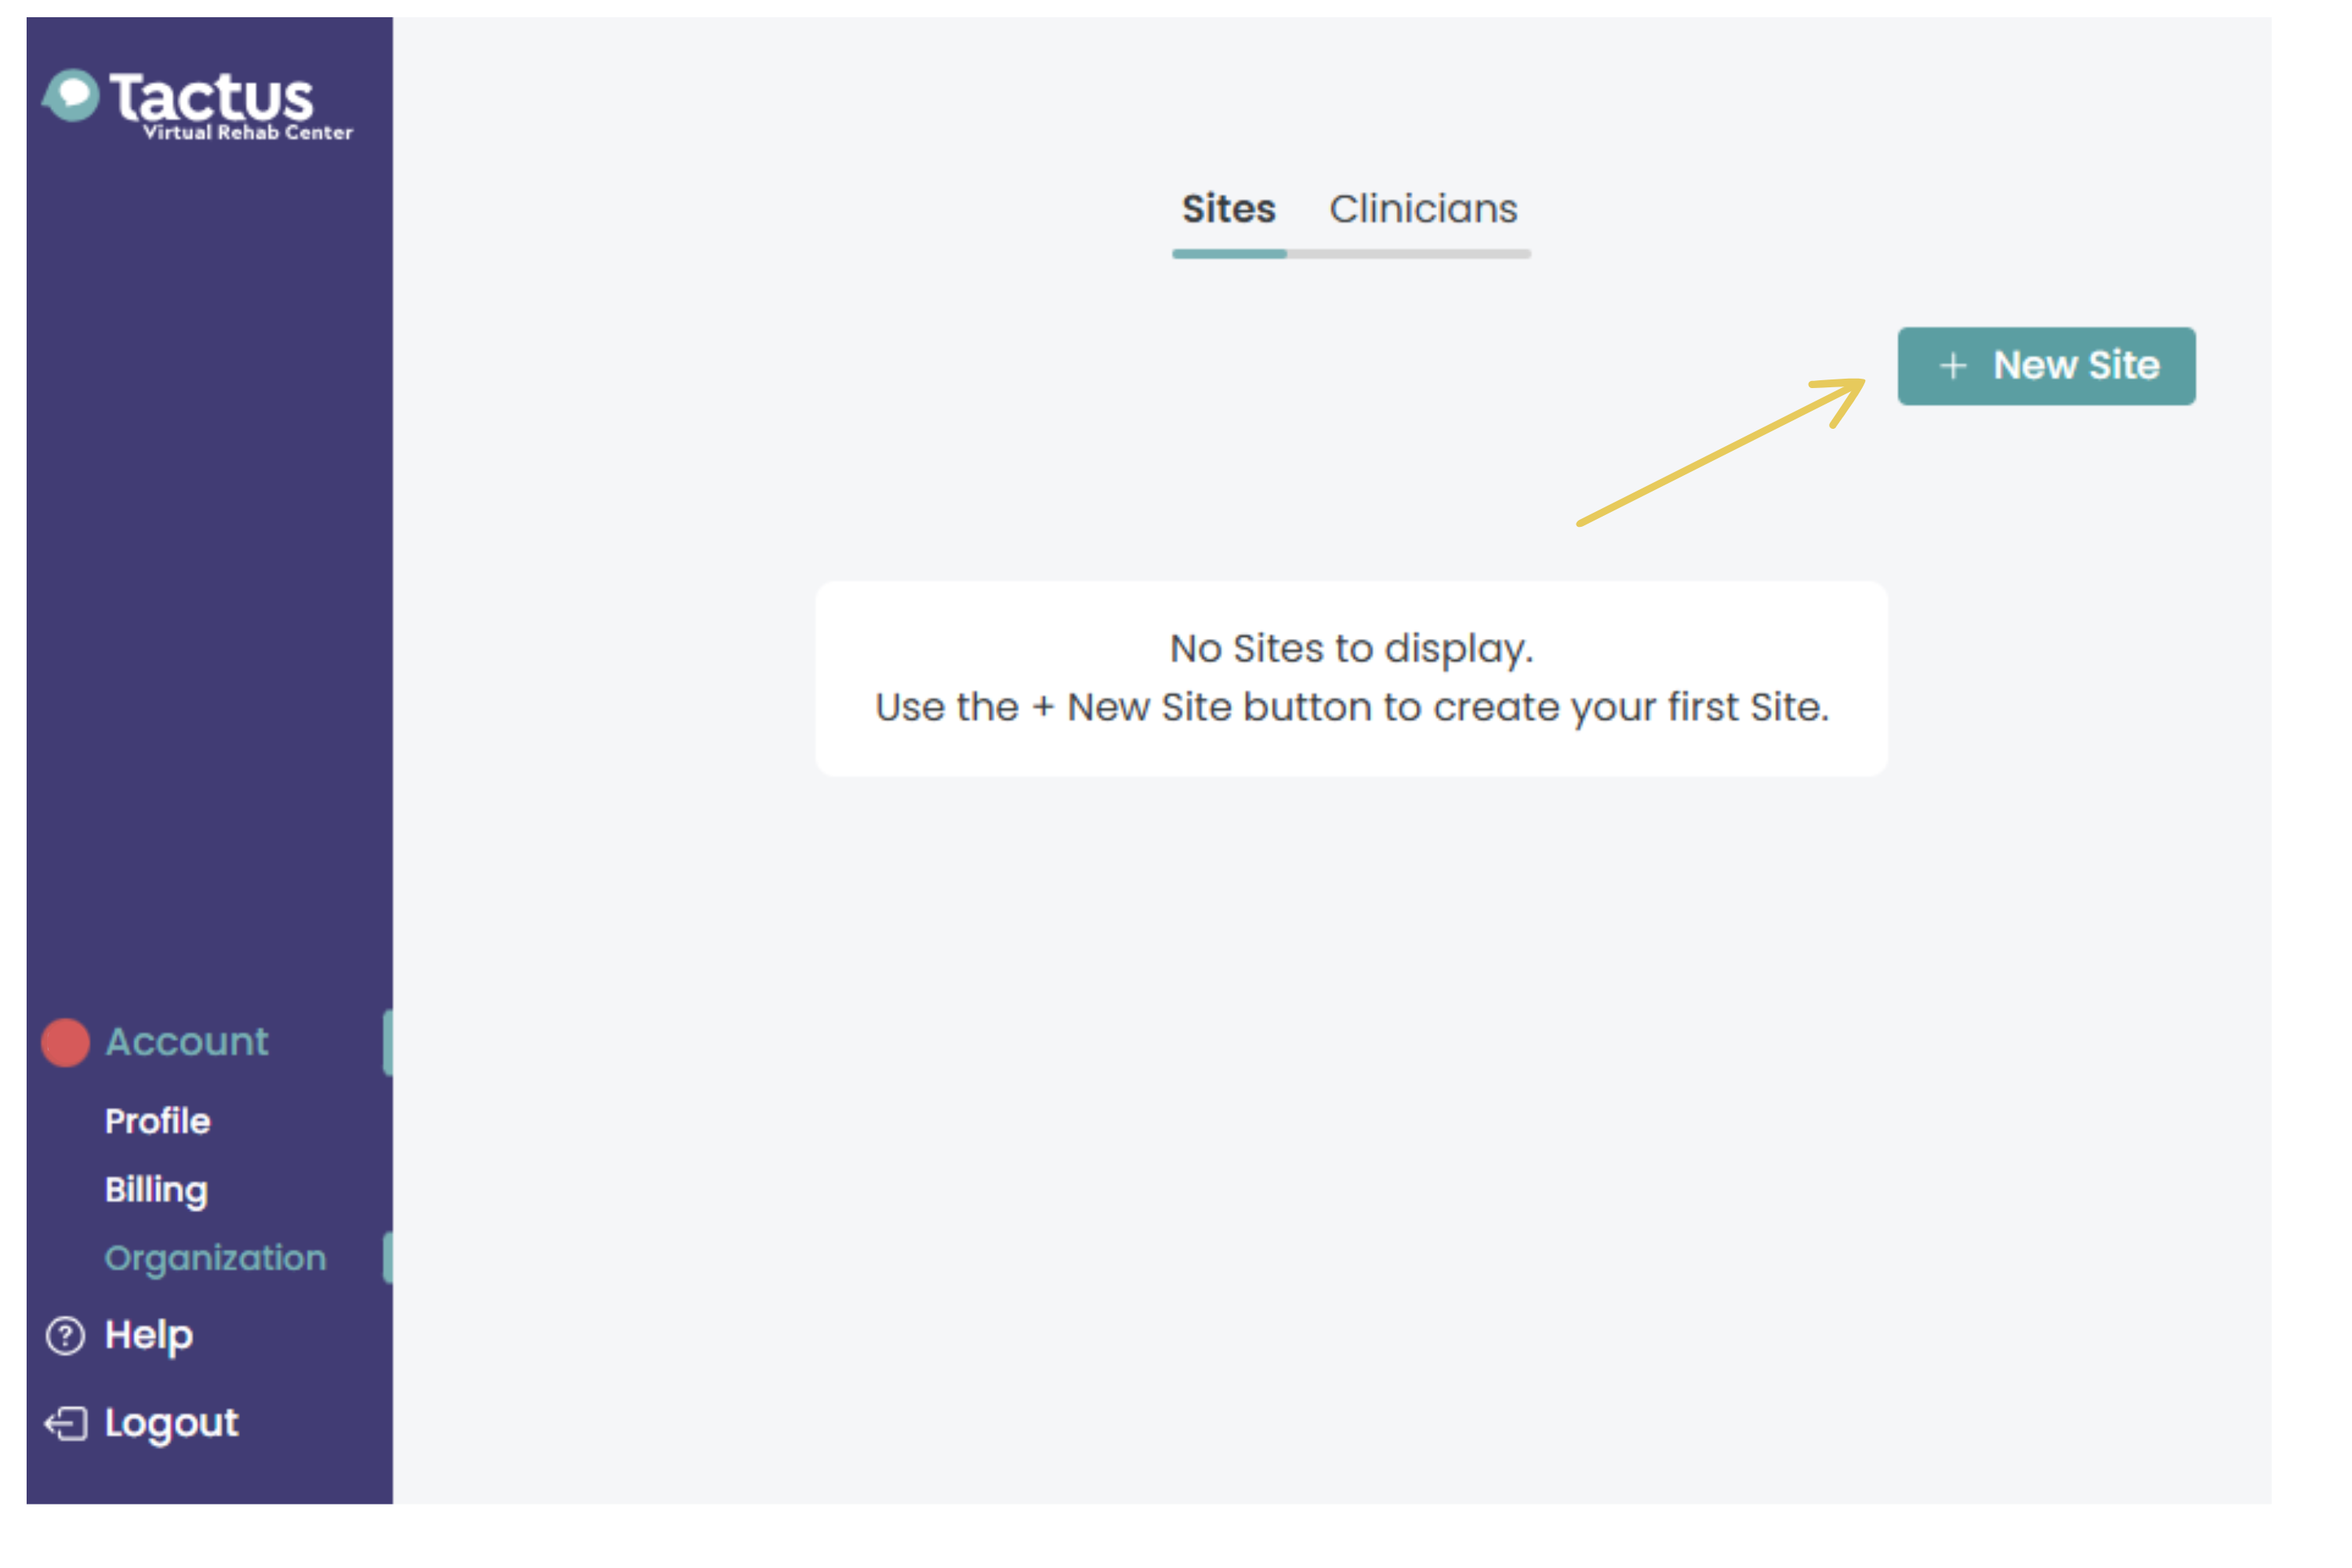
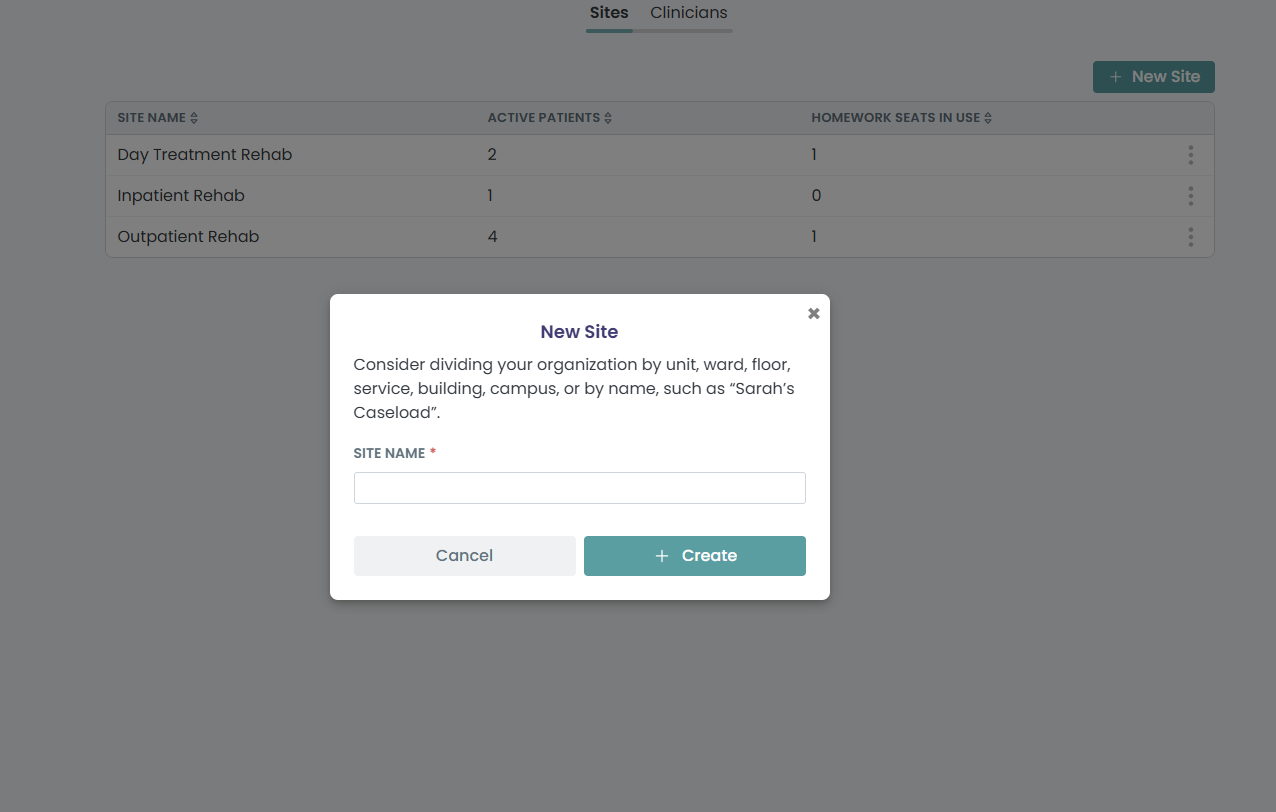
Click + New Site and add a site name. You can use your university clinic name, a specific course (e.g., Neuro Course 1), or clinical supervisors (e.g., Mrs. P’s Patients).
Select + Create.
To set up additional sites: Click + New Site, enter another Site Name, and click + Create.
Note: You can start with one site, and add additional sites later. Site names can be edited by clicking the three dots at the end of the row.
Step 4: Add Clinicians
After you have set up your site(s), you can add your clinicians and staff. You will need your staff and clinicians' names and the email addresses they will use to log in to the Virtual Rehab Center.
To add your clinicians:
- Click on Clinicians at the top of the screen (next to Sites). Your available licenses are displayed.

- Click + Invite and enter the user's first name, last name, email and role.
- Select a Role. For students add the expected graduation month and year.
Roles include:
- Student or Staff Clinician
- Student or Staff Clinician with Manager Access
- Manager Only
Manager access: Multiple users can have manager access to add, remove, or place clinicians on leave and view last logins. Manager Only users do not have access to clinician controls (e.g., patient history, patient list, treatments, etc.) in the Virtual Rehab Center.
-
Click + Send Invite to send an automatic email prompting the clinician or staff member to set up a password and log in.
Note: If you need to update the clinician or staff role(s), you will not be able to do so while they are in 'pending' state. Once they have accepted their invitation, you can update their role as needed.
- Repeat until all allotted licenses are assigned.


Add Yourself as a Clinician
If one of the licenses is for you, find your name and email under the Clinicians tab and click on the three dot menu at the end of the row. Select + Add as Clinician. Once added, you'll see all the Virtual Rehab Center (VRC) menu options appear on the left sidebar.


Manage Clinician Licenses
1) Navigate to the Organization Page
To make changes to your sites or add clinicians, go to the Organization page.
Click on: Account (in the lower left sidebar) > Organization (submenu below Account) > Clinicians (next to Sites in the center) to manage clinician licenses

2) Edit User
Click the three-dot menu next to a user's name and select Edit to change the role of the user, adjust a student's graduation date, or change a user to a student or staff clinician.
You can adjust roles for active clinicians or staff members. If a clinician or staff member is in 'pending' status, you must wait until their invitation has been accepted and they are 'active' to update their role(s).
3) Place Clinicians On Leave
If a clinician goes on leave (medical, vacation, etc.), you can free up their license to assign to their coverage. To place a clinician on leave, go to the Clinicians tab (under Organization):
- Click the three-dot menu next to their name.
- Select Place On Leave—they won’t be able to log in, but you can reactivate them anytime.
- To Reactivate, click the three-dot menu and select 'reactivate.'
Note: You must have an available license to reactivate a clinician.

4) Adding Manager Access
More than one user can have manager access, making it easy to share management responsibilities or transfer access when needed.
- To give a current student or staff member manager access, click the three-dot menu next to their name and select + Add as Manager.
- To invite a new manager, click + Invite and select Manager Only as their role.
Note: Multiple users can have manager access to invite/remove users and monitor usage.

5) Removing Manager Access
To remove a user's manager access, select the three-dot menu next to the user's name and select - Remove as Manager. If the user is also assigned as a clinician, they will still have access to the Virtual Rehab Center.
Note: You must always have at least one assigned manager. You cannot remove your own manager access, but another manager can remove your access.
6) Remove Users
If a student graduates or a staff member no longer works at your university, you can revoke their access to the Virtual Rehab Center permanently. To remove a clinician, go to the Clinicians tab:
- Click the three-dot menu next to their name.
- Select Remove—this revokes their access.
When you remove a user or place them on leave, their license becomes available for another user.
If they might return, we recommend placing them on leave instead of removing them.
Need more licenses? Contact vrcsupport@tactustherapy.com to make changes to your plan.
Troubleshoot Clinician Invites
Q. How do I know if a user has accepted their invitation to join the Virtual Rehab Center?
A. You will see the Status of each clinician as 'pending' or 'active' on the Clinicians tab. 'Pending' means they have not yet set up a password or logged in.
Q. The clinician did not get the email— Can I resend their invitation?
A. Yes, you can edit their email as needed and/or resend their invitation by clicking the three-dot menu next to their name under the Clinicians tab.

Emails to setup user accounts come from vrcsupport@tactustherapy.com. Please have users search spam or junk folders if they don’t see the email in their inbox.
Monitor Clinician Usage
To monitor clinician usage of the Virtual Rehab Center, you can go to the Clinicians tab and see when each clinician logged in last. More usage statistics will be coming soon! Let us know what you would like to see.
Manage Homework Seats
As a group, homework seats are pooled within your organization, allowing clinicians to allocate them based on their needs. This means some clinicians may use more seats than others.
We will provide you with tools to monitor homework seat allocation in the future.
Sharing Patients
A key benefit of the group plan is shared access to patient profiles within a site. All patients within your site are visible to the clinicians under the Patients list. The clinicians can:
- Search for patients by name.
- Use filters to find patients they recently treated.
- Filter patients by site(s)
Privacy: The Virtual Rehab Center is a secure and private service. It's safe to enter data about patients. We collect the minimum amount of data necessary to deliver recommendations, reports, and homework. It is still up to your healthcare providers to only view and access the records they need to do their job.
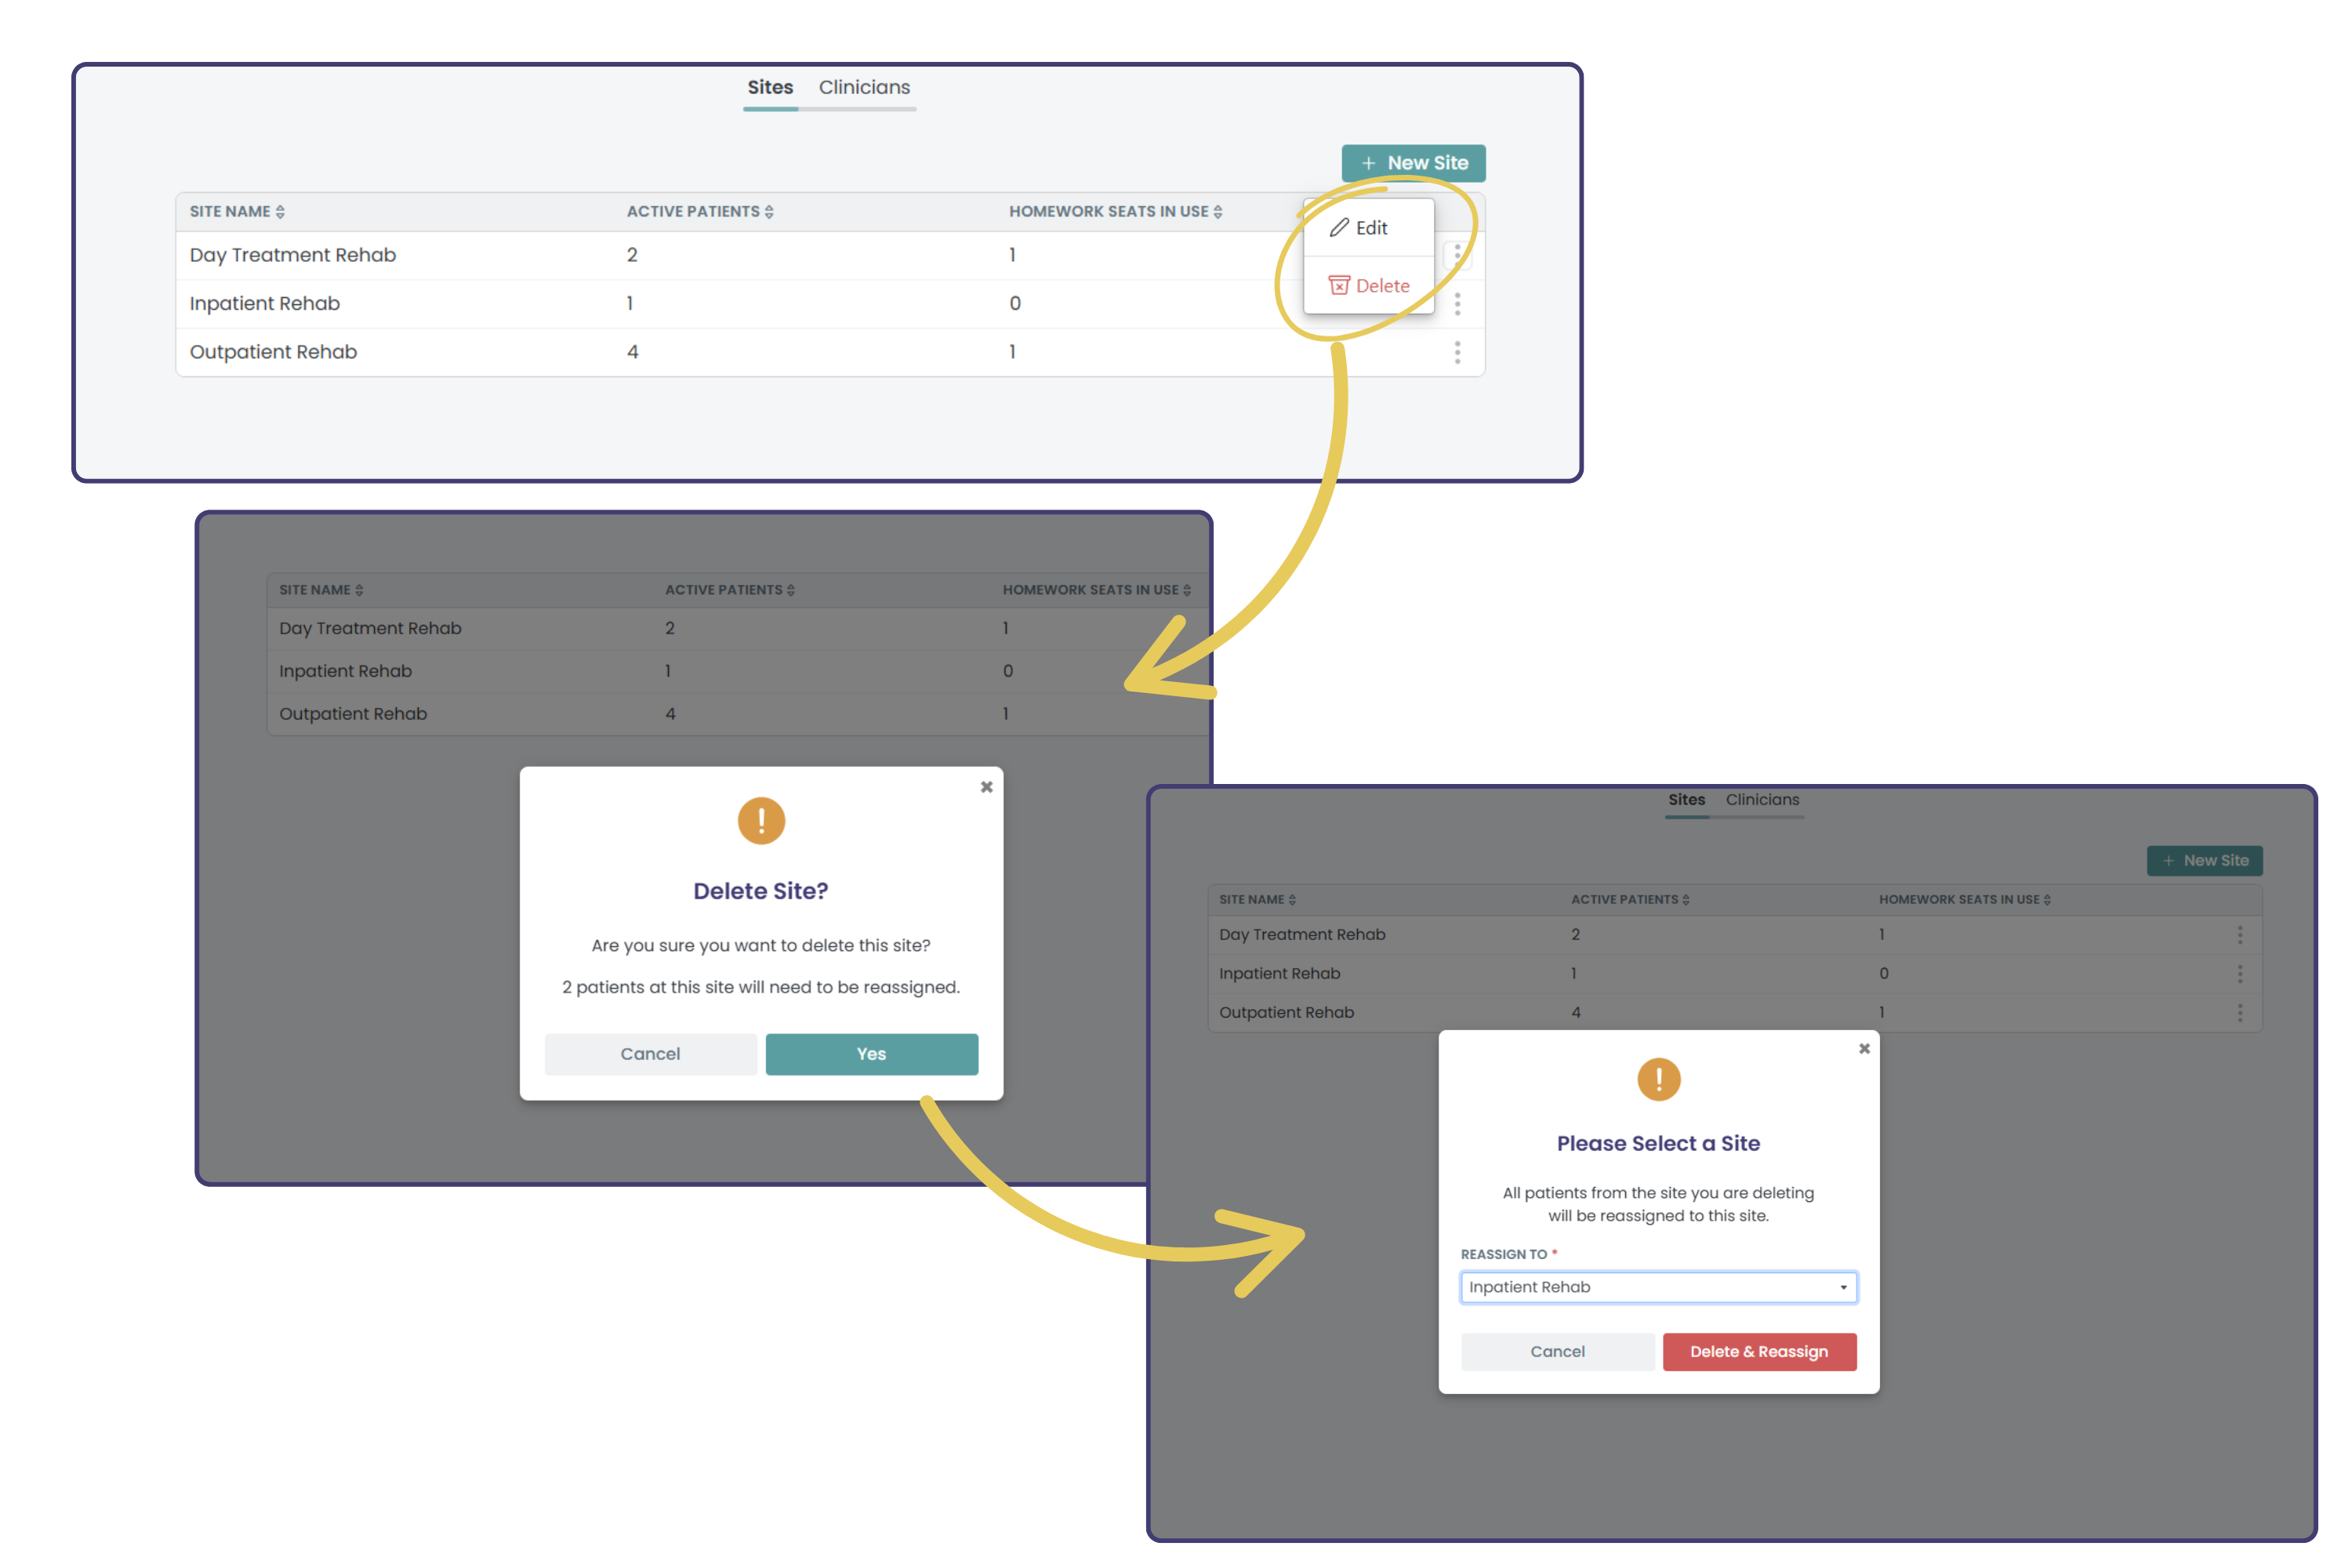
Deleting or Editing Sites
You can edit or delete a site by selecting the three-dot menu next to the site name. If there are patients within a site that you would like to delete, you will need to reassign them to another site.